LED Octopus Hat
November 26, 2022
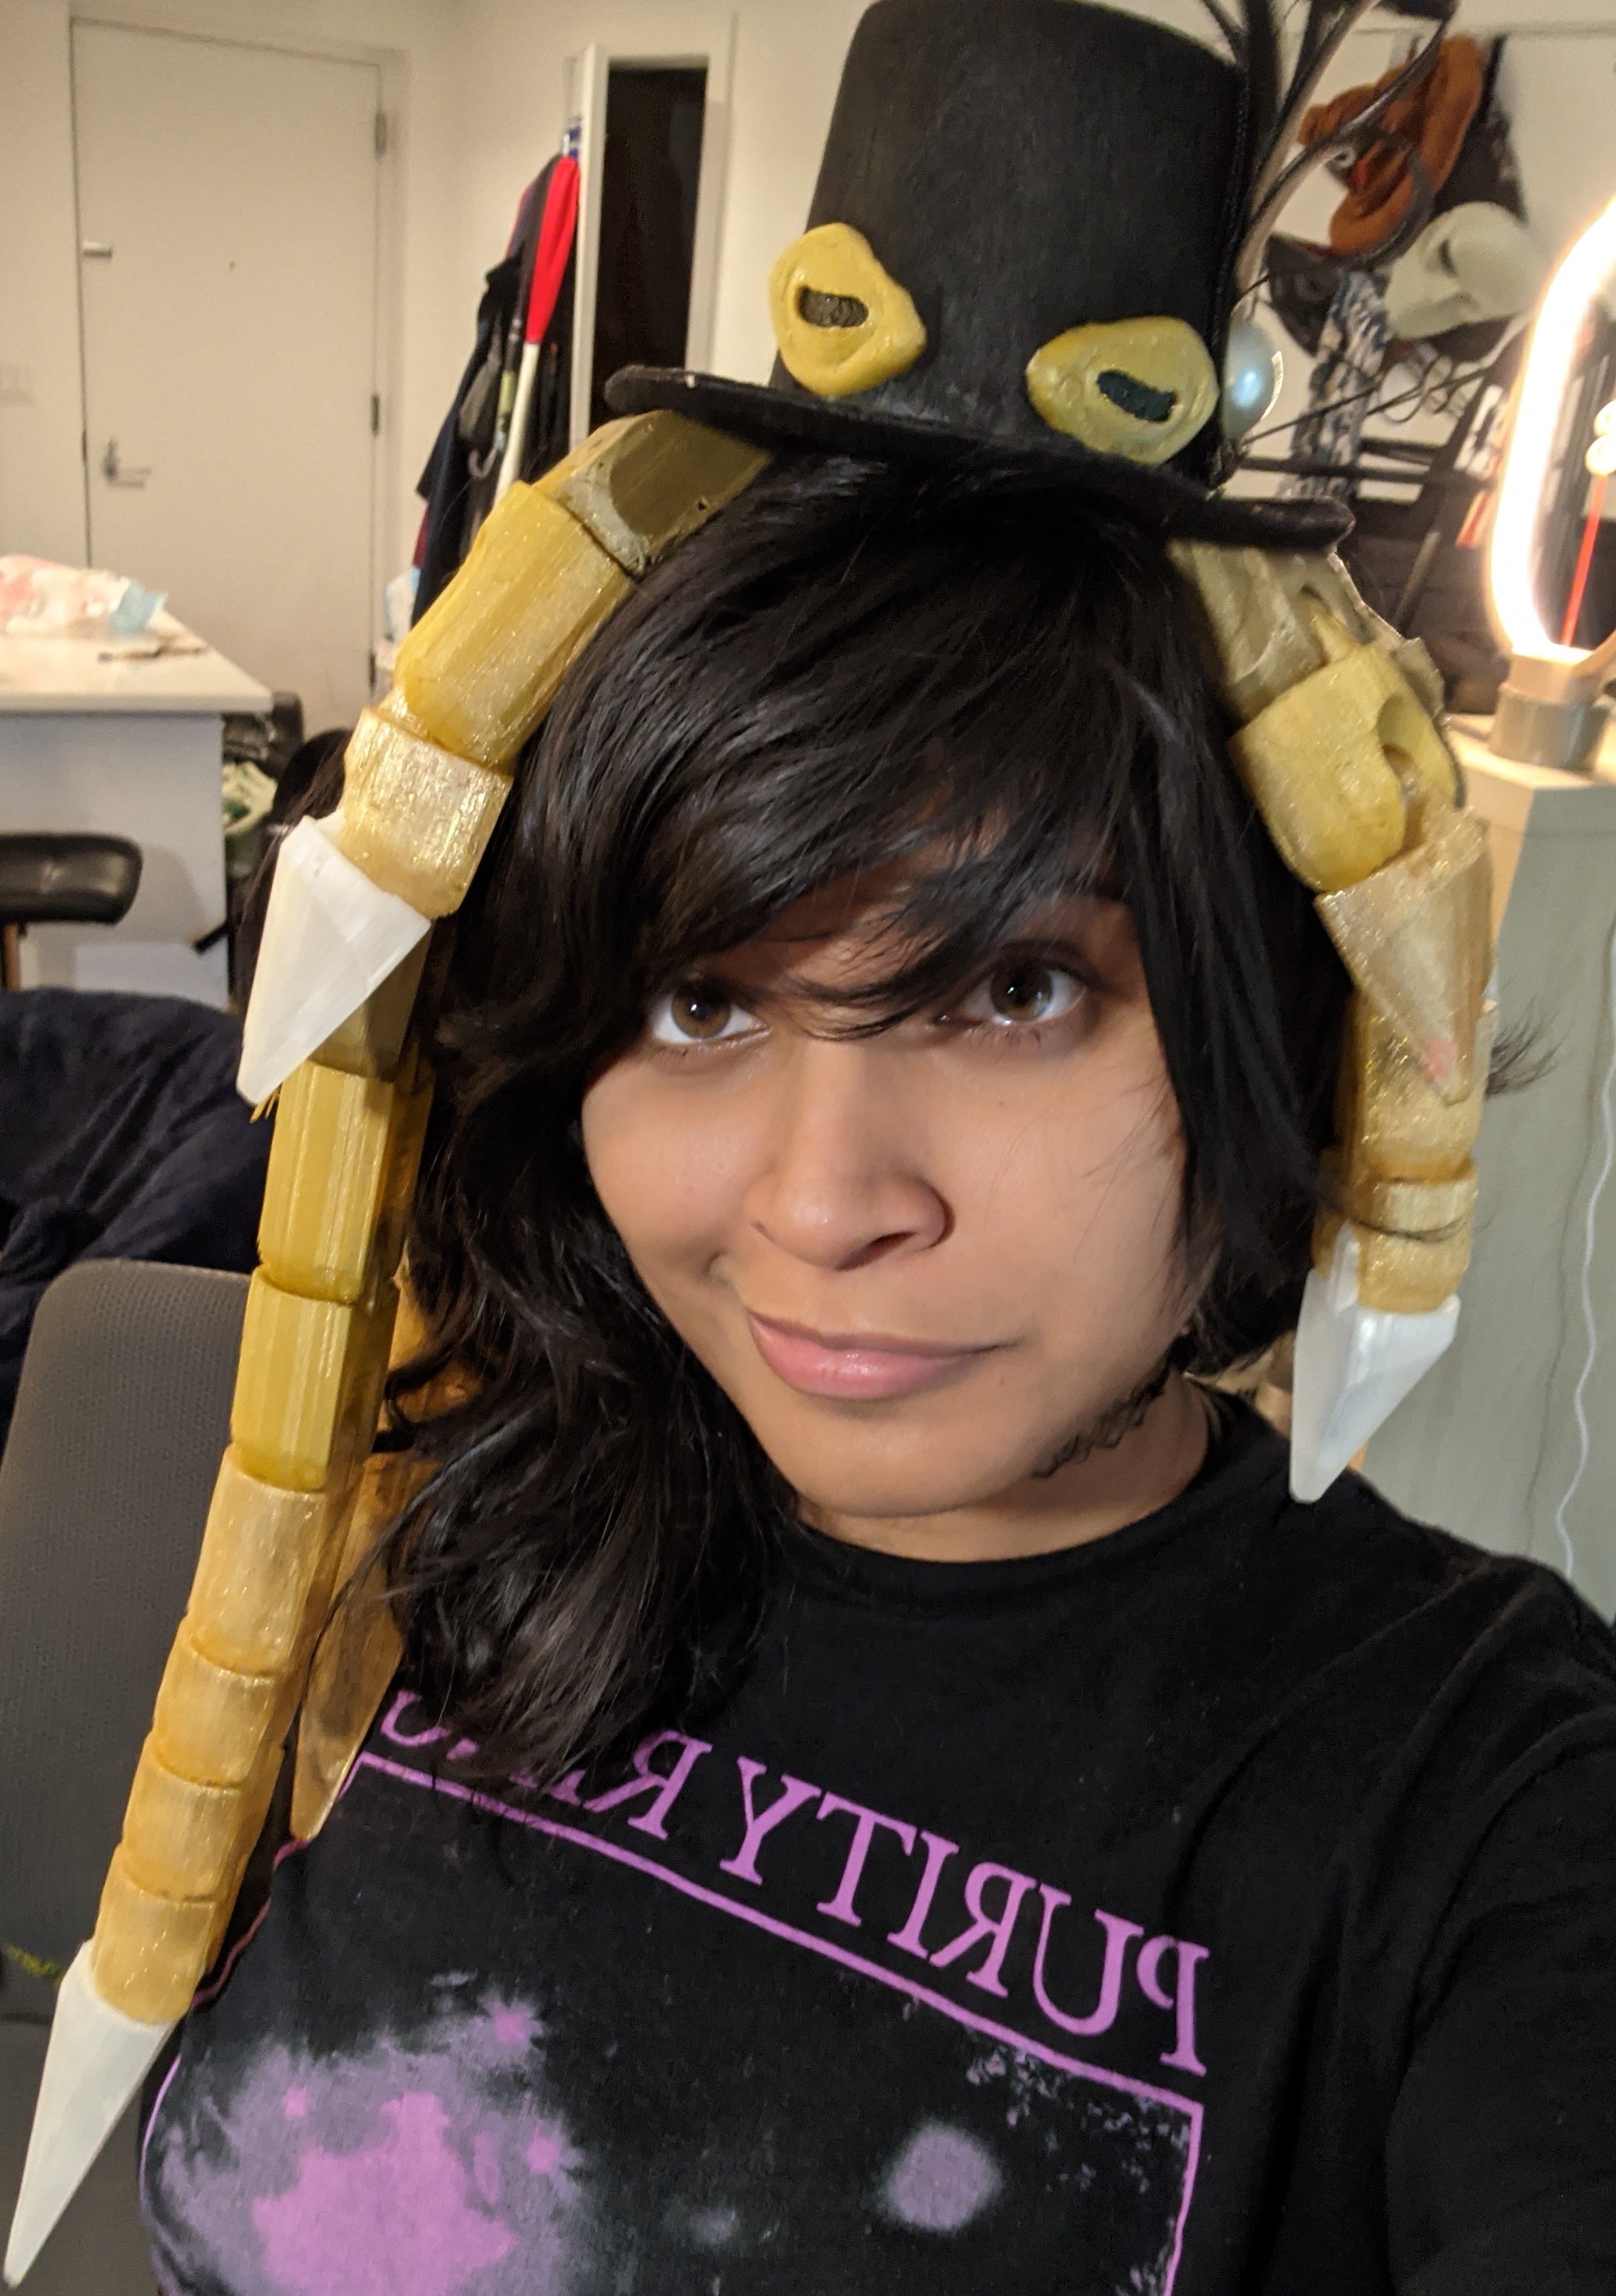
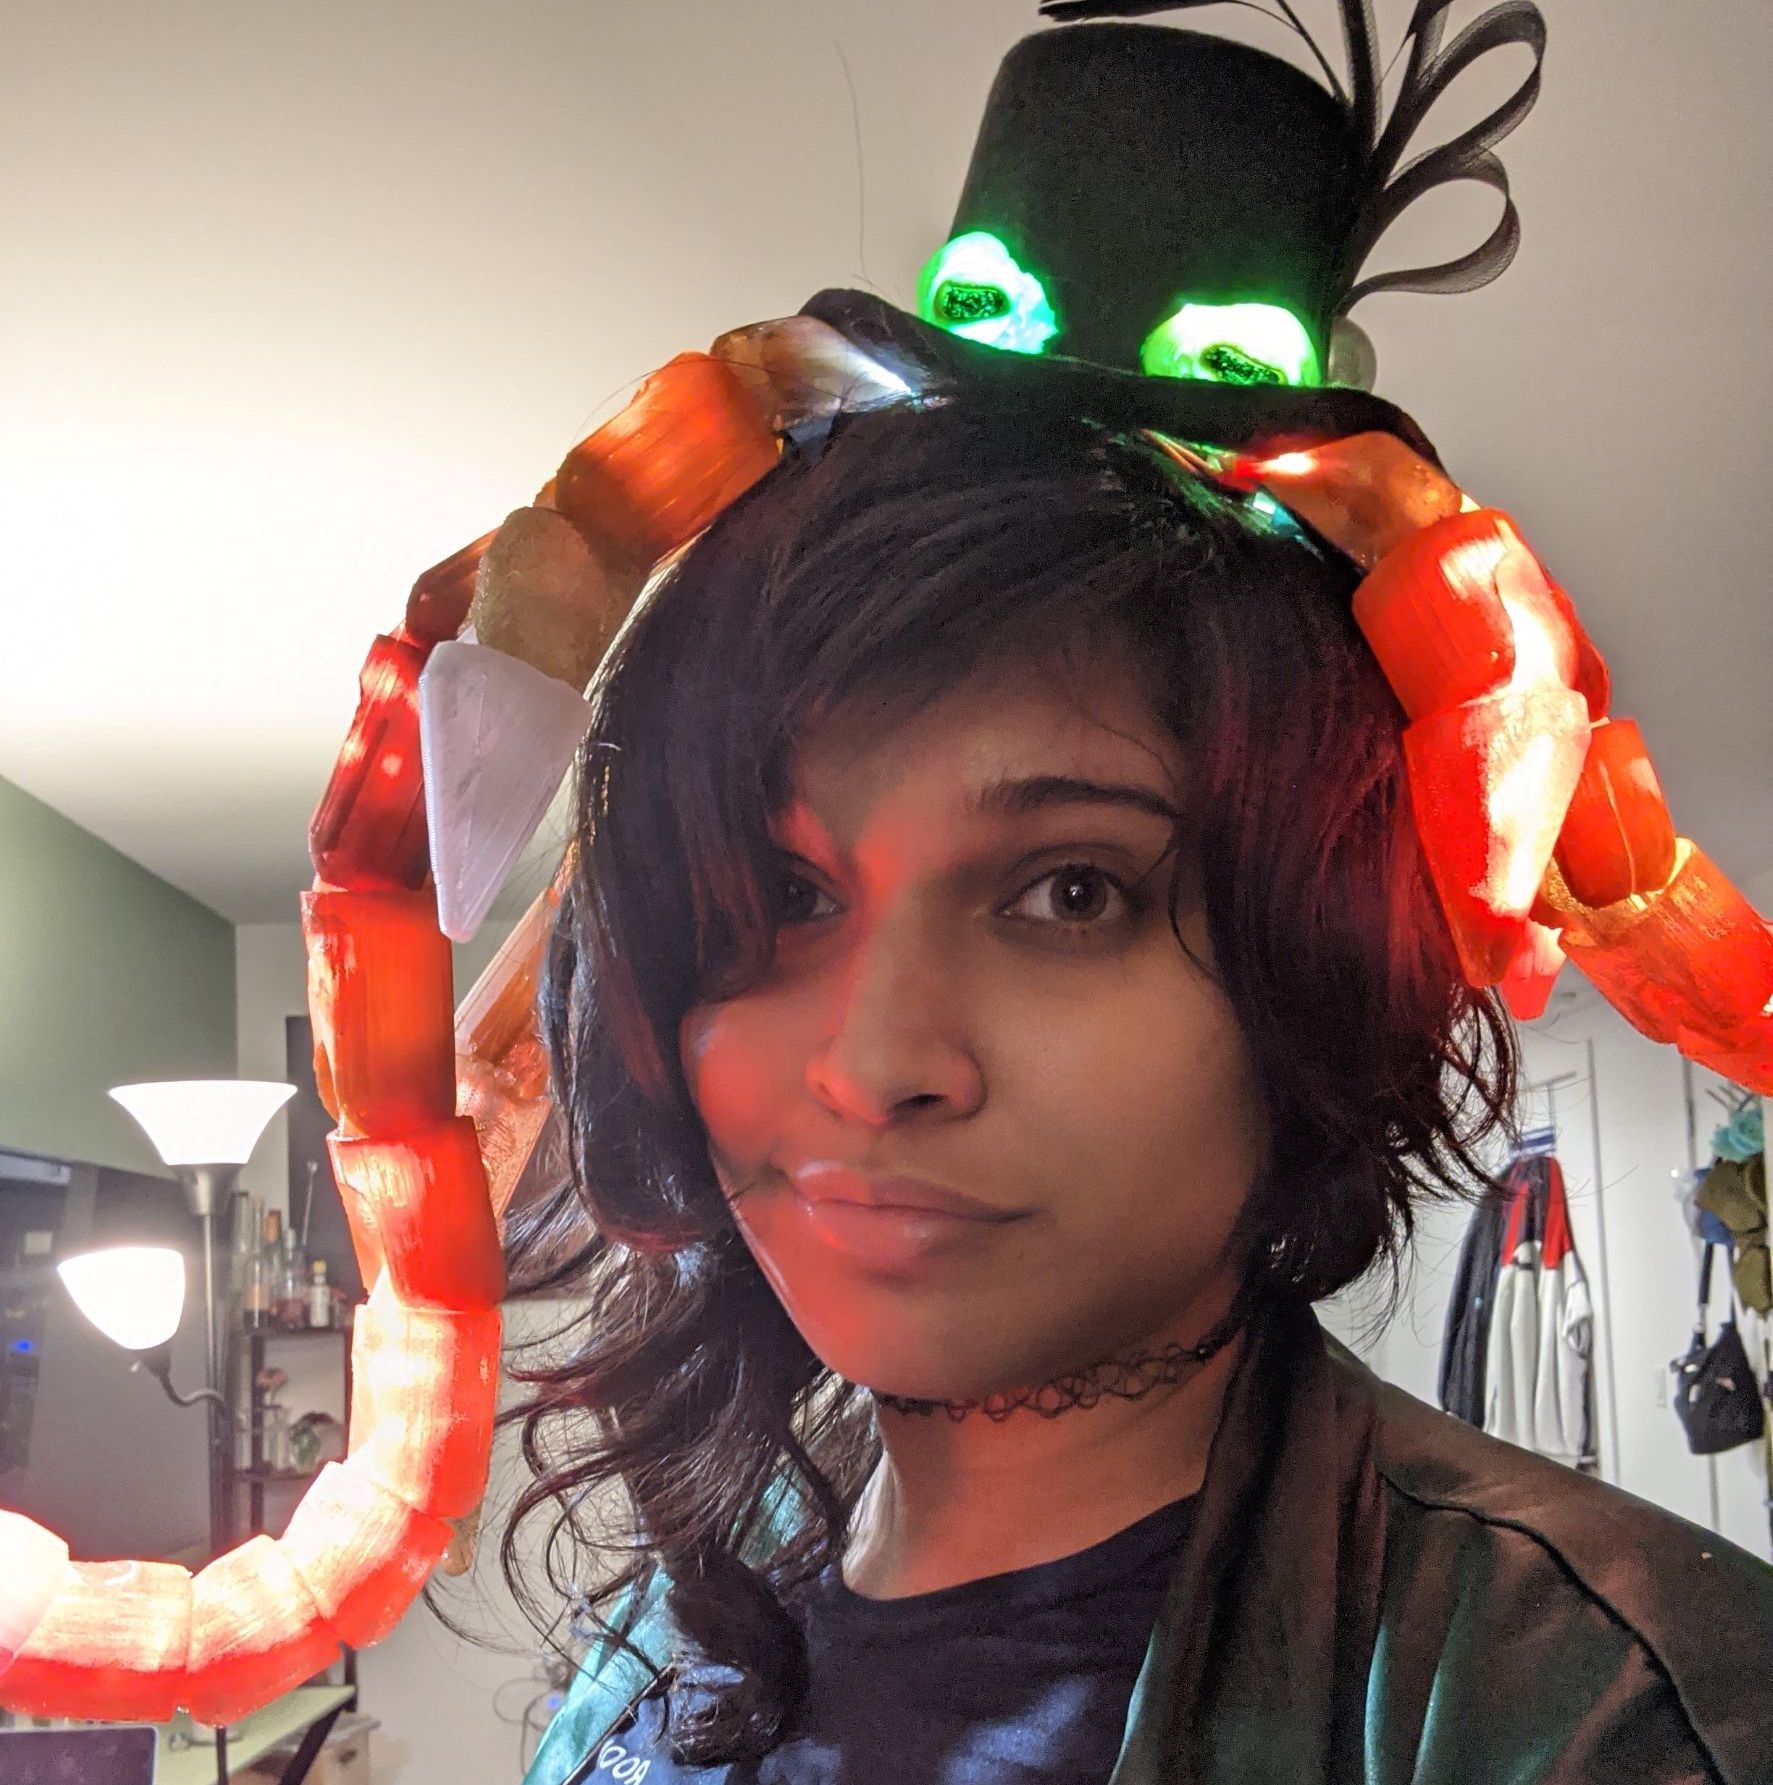
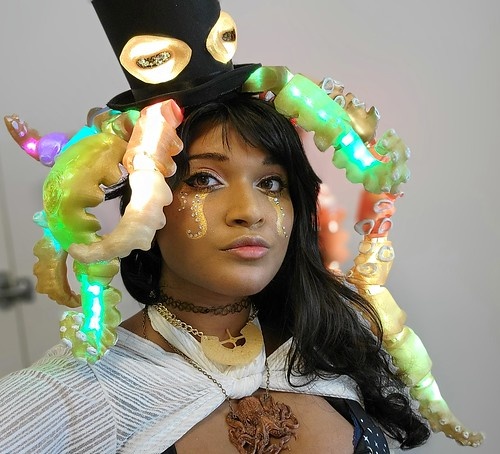
A lightup octopus hat I coded, 3D model designed, printed, and made!
Basic overview
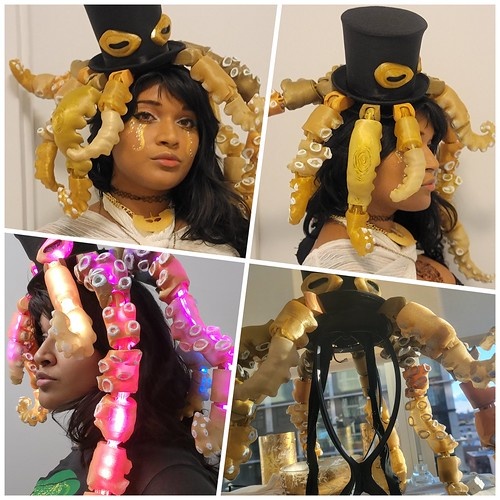
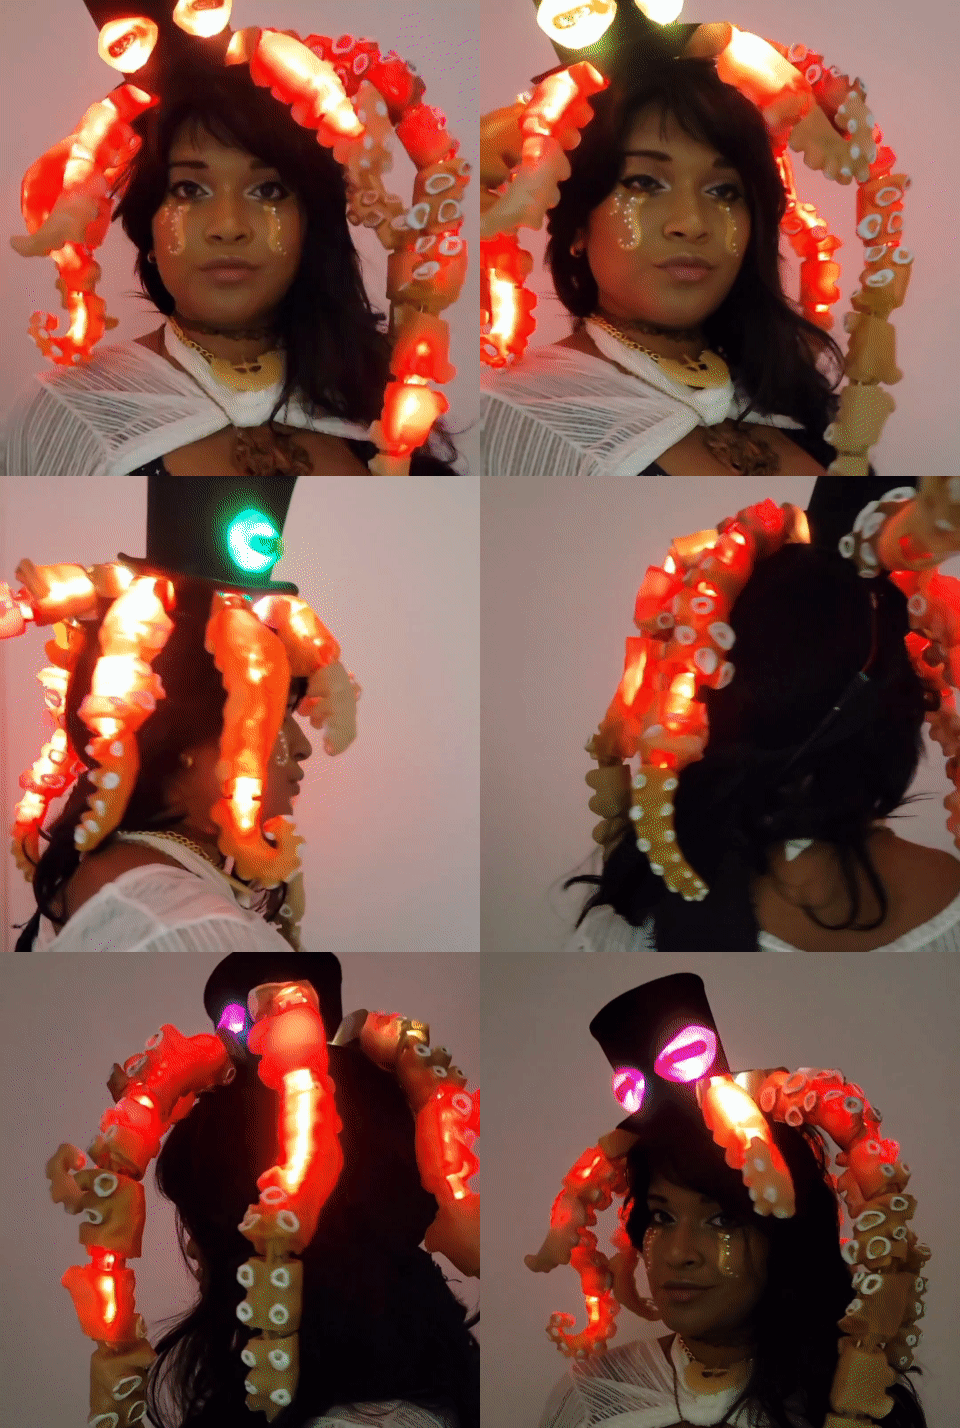
This hat was a labor of love, and taught me so much about LED programming, electrical wiring, better 3d-modelling, and more! It's made from 3d-printed ball-jointed tentacles that are hollow inside, containing programmable LED strips and a wire to make them positionable. The hat itself is a felt hat, hollowed out to fit the controller and batteries and wiring, with holes for the light-up eyes. It lasts for about 4-6 hours on the built-in batteries alone and cycles through a variety of patterns I programmed in. To learn how I did it and more, read on!
Lessons Learned
- How to wire LED strips, code a microcontroller, and assemble a Li Ion battery pack.
- How to design and print a large-scale project, meant to work with LEDs.
- Always check the polarity of connectors (esp JST connectors), and swap as needed. (Apparently pcb/arduino usage is different than rc car ones, whatever)
- Batteries in PARALLEL add amperage, in SERIES add voltage! Also, connecting a bunch of wires together is ALWAYS in parallel!
- Use a resistor to emulate amp load (and desired voltage draw).
- Gel nail polish is BS
- Painting/general cleanup of 3d printed segments can take longer than expected; the less post-processing needed, the MUCH better.
Modelling the tentacles
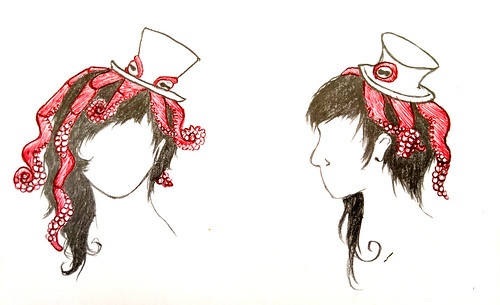
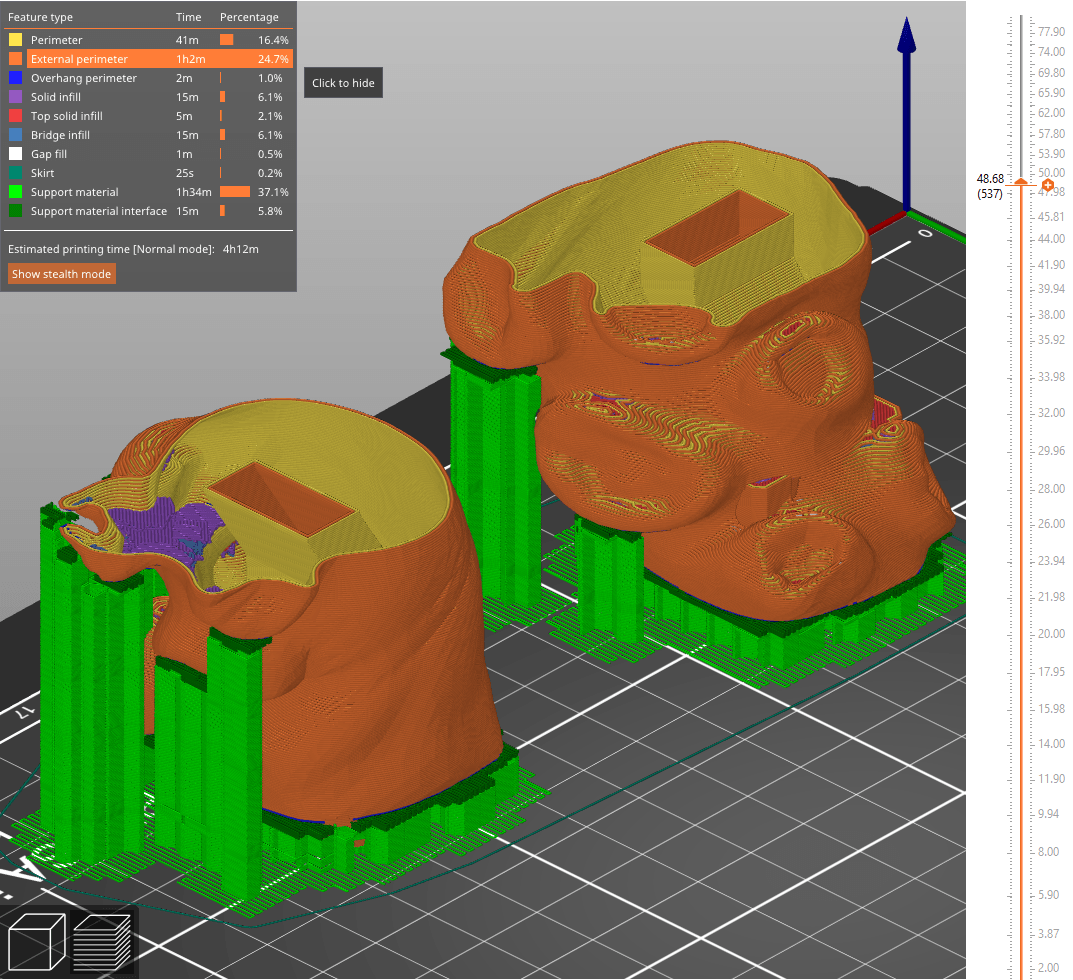
All the modelling was done in Blender. Using pre-existing assets of ball joints from Thingiverse, I twisted and sculpted tentacles to fit with the joints. I hollowed out the tentacles to leave room for the LEDs, while also optimizing how the tentacles looked for best layers when 3D printing. When printing the actual tentacles, I used minimum shell/wall thickness for maximum light output.

Programming the LEDs
The controller used for this hat is the Teensy 3.2, with the OctoWS2811 Adaptor for handling LEDs. Definitely overkill for a project with barely hundreds of LEDs, instead of thousands, but it's what was first recommended to me so it's what I used! I learned a lot about programming microcontrollers, including how the Arduino framework works and various LED libraries. I didn't use the FastLED library as is usually standard, but rather the very similar OctoWS2811 LED Library which is tailor-made for the controller I used. Both the FastLED and OctoWS2811 operate similarly on the Arduino framework for programming a microcontroller, namely that there has to be a loop() function in the .ino file that is the main entryway into the file.
As a programmer I felt confident in my ability to program these LEDs, but there was definitely a lot to learn about the way microcontroller programming works; namely, that though it uses C++ code syntax and file structure, the execution of the code is done differently from standard cpus -- it's single threaded and all code is blocking. Other issues cropped up due to the number of clock cycles and how LED instructions are sent, all of which was very interesting to go through! To see the code for the LED patterns I whipped up, see below; the OctopusHat.ino file is the main entryway with the other files defining patterns that (hopefully) I get a chance to re-use in future work. I'll upload the project to Github if you ask me to ;)
1
2
3
4
5
6
7
8
9
10
11
12
13
14
15
16
17
18
19
20
21
22
23
24
25
26
27
28
29
30
31
32
33
34
35
36
37
38
39
40
41
42
43
44
45
46
47
48
49
50
51
52
53
54
55
56
57
58
59
60
61
62
63
64
65
66
67
68
69
70
71
72
73
74
75
76
77
78
79
80
81
82
83
84
85
86
87
88
89
90
91
#include <OctoWS2811.h>
#include "ledStripPatterns.h"


// Max num of LEDs per a strip
const int ledsPerStrip = 30;

// Seems excessive to have *6 but w/e
DMAMEM int displayMemory[ledsPerStrip*6];
int drawingMemory[ledsPerStrip*6];
// Strip I'm currently using is GRB
const int config = WS2811_GRB | WS2811_800kHz;


// Indices for the octopus LEDs (arms are uneven lengths)
const int LEDStarts[8] = {0,ledsPerStrip*1, ledsPerStrip*2, ledsPerStrip*3, ledsPerStrip*4,
                          ledsPerStrip*5, ledsPerStrip*6, ledsPerStrip*7};
const int LEDEnds[8] = {7,ledsPerStrip*1 + 14, ledsPerStrip*2 + 9, ledsPerStrip*3 + 15,
                        ledsPerStrip*4 + 19, ledsPerStrip*5 + 22, ledsPerStrip*6 + 29, ledsPerStrip*7 + 9};

// Octopus eyes indices, are on pin/strip #1
const int eyesStart = 8;
const int eyesEnd = 13;

// Predefined colors for bouncing ball animation
int ballColors[8][2];
//rgb color from bright to dark
// const int oceanColors[4] = { 0x4c738f, 0x9ec6d0, 0x2c8fa3,  0x003136 };
const int oceanColors[4] = { BLUE, PURPLE, PINK, RED };


// Main call that creates the leds object to use with OctoWS2811
OctoWS2811 leds(ledsPerStrip, displayMemory, drawingMemory, config);

// Init the strip patterns class
StripPatterns patterns(LibraryUsed::OCTO_LIB);

void setup() {

  for (int i = 0; i < 8; i++) {
    ballColors[i][0] = patterns.rainbowColors[(i+1)*24 % 180];
    ballColors[i][1] = patterns.rainbowColors[(i+1)*26 % 180];
  }

  leds.begin();
  Serial.begin(38400);
}


const int loopTimeSecs = 30;
const int rainbowDelay = 1100;
int NumFunctions = 4;

void loop() {

  static int currInd = 0;
  static int lastMillis = millis();


  int i;
  switch (currInd) {
    case 0:
        for (i = 0; i < 8; i++) patterns.MeteorRain(patterns.rainbowColors[(i+12)*7 % 180], LEDStarts[i], LEDEnds[i], i, 128, 60);
      break;
    case 1:
        for (i = 0; i < 8; i++) patterns.Fire(45, 120, 40, LEDStarts[i], LEDEnds[i]);
      break;
    case 2:
        for (i = 0; i < 8; i++) patterns.BouncingColoredBalls(2, ballColors[i], LEDStarts[i], LEDEnds[i], i);
      break;
    case 3:
      for (i = 0; i < 8; i++) patterns.RainbowIndividual(rainbowDelay, LEDStarts[i], LEDEnds[i]);
    break;
  }

  // Rainbow eyes!!
  patterns.RainbowIndividual(rainbowDelay, eyesStart, eyesEnd);

  // Loop thru all designs
  if (lastMillis + (loopTimeSecs * 1000) < millis()) {
    lastMillis = millis();
    currInd = ++currInd % NumFunctions;
  }

  // Only show rainbow once
  if (lastMillis / (loopTimeSecs * 1000) > NumFunctions ) {
    NumFunctions = 3;
  }
}
1
2
3
4
5
6
7
8
9
10
11
12
13
14
15
16
17
18
19
20
21
22
23
24
25
26
27
28
29
30
31
32
33
34
35
36
37
38
39
40
41
42
43
44
45
46
47
48
49
50
51
52
53
54
55
56
57
58
59
60
61
62
63
64
65
66
67
68
69
70
71
72
73
74
75
76
77
78
79
80
81
82
83
84
85
86
87
88
89
90
91
92
93
94
95
96
97
98
99
100
101
102
103
104
105
106
107
108
109
110
111
112
113
114
115
116
117
118
119
120
121
122
123
124
125
126
127
128
129
130
131
132
133
134
135
136
137
138
139
140
141
142
143
144
145
146
147
148
149
150
151
152
153
154
155
156
157
158
159
160
161
162
163
164
165
166
167
168
169
170
171
172
173
174
175
176
177
178
179
180
181
182
183
184
185
186
187
188
189
190
191
192
193
194
195
196
197
198
199
200
201
202
203
204
205
206
207
208
209
210
211
212
213
214
215
216
217
218
219
220
221
222
223
224
225
226
227
228
229
230
231
232
233
234
235
236
237
238
239
240
241
242
243
244
245
246
247
248
249
250
251
252
253
254
255
256
257
258
259
260
261
262
263
264
265
266
267
268
269
270
271
272
273
274
275
276
277
278
279
280
281
282
283
284
285
286
287
288
289
290
291
292
293
294
295
296
297
298
299
300
301
302
#include <Arduino.h>
#include <OctoWS2811.h>
#include <FastLED.h>
#include "ledStripPatterns.h"
#include "ledUtilities.h"


StripPatterns::StripPatterns(LibraryUsed library) {
  LibraryUsed _library = library;

  // pre-compute the 180 rainbow colors
  for (int i=0; i<180; i++) {
    int hue = i * 2;
    int saturation = 100;
    int lightness = 50;

    rainbowColors[i] = makeColor(hue, saturation, lightness);
  }
}

/**
 * Adapted from https://www.tweaking4all.com/hardware/arduino/adruino-led-strip-effects
 * meteorSize – the number of LEDs that represent the meteor, not counting the tail of the meteor
 * meteorTrailDecay - how fast the meteor tail decays/ disappears. A larger number makes the tail short and/or disappear faster.
 *    Theoretically a value of 64 should reduce the brightness by 25% for each time the meteor gets drawn.
 * speedDelay - how many milliseconds (1000 milliseconds in a second) the drawing will be delayed
*/
void StripPatterns::MeteorRain(int color, int startInd, int endInd, int strip, byte meteorTrailDecay, int speedDelay) {
  static int stripInds[STRIPS];

  // Delay code
  static int lastMillis = millis();
  static int lastStart = 0;
  // Delay without actually pausing the whole teensy, allowing for other delays on other pixel rows in a single loop
  if (millis() - lastMillis < speedDelay) return;
  // Update the delay time once per loop ASSUMING that a loop INCREMENTS through the pixels (++)!!!
  if (lastStart > startInd) lastMillis = millis();
  lastStart = startInd;

  // Set the starting ind to not be zero, but the actual starting ind
  if (stripInds[strip] < startInd) stripInds[strip] = startInd;

  // fade brightness all LEDs one step
  for (int j = startInd; j < endInd + 1; j++) {
    if (random(10)>5) {
      fadeToBlack(j, meteorTrailDecay );
    }
  }


  // draw meteor
  int meteorSize = max((endInd - startInd + 1) / 10, 1);
  for(int j = 0; j < meteorSize; j++) {
    if( (stripInds[strip] - j < endInd+1) && (stripInds[strip]-j >= startInd) ) {
      setPixel(stripInds[strip]-j, color);
    }
  }

  showStrip();

  // Emulate a loop through startInd < i < endInd*2, aka all leds twice (for decay niceness)
  stripInds[strip] = (stripInds[strip] + 1) % (endInd*2 - startInd);
}


/**
 * Adapted from https://www.tweaking4all.com/hardware/arduino/adruino-led-strip-effects
 *
 * Max num of balls = 4
 * Max num of strips/legs = 8
*/
void StripPatterns::BouncingColoredBalls(int BallCount, int colors[], int startInd, int endInd, int leg, bool reverse) {
  const float Gravity = -9.81;
  const int StartHeight = 1;
  const float ImpactVelocityStart = sqrt( -2 * Gravity * StartHeight );
  const int MaxBalls = 4;


  // Max 4 balls, per each strip /
  static float Height[STRIPS][MaxBalls];
  static float ImpactVelocity[STRIPS][MaxBalls];
  static float TimeSinceLastBounce[STRIPS][MaxBalls];
  static int   Position[STRIPS][MaxBalls];
  static long  ClockTimeSinceLastBounce[STRIPS][MaxBalls];
  static float Dampening[STRIPS][MaxBalls];
  static bool init[STRIPS] = {true, true, true, true, true, true, true, true};

  if (init[leg]) for (int i = 0 ; i < BallCount ; i++) {
    ClockTimeSinceLastBounce[leg][i] = millis() - leg*1000;
    Height[leg][i] = StartHeight;
    Position[leg][i] = 0;
    ImpactVelocity[leg][i] = ImpactVelocityStart;
    TimeSinceLastBounce[leg][i] = 0;
    Dampening[leg][i] = 0.90 - float(i)/pow(BallCount,2);
    init[leg] = false;
  }

    for (int i = 0 ; i < BallCount ; i++) {
        TimeSinceLastBounce[leg][i] =  millis() - ClockTimeSinceLastBounce[leg][i];
        Height[leg][i] = 0.5 * Gravity * pow( TimeSinceLastBounce[leg][i]/1000 , 2.0 ) + ImpactVelocity[leg][i] * TimeSinceLastBounce[leg][i]/1000;

        if ( Height[leg][i] < 0 ) {
        Height[leg][i] = 0;
        ImpactVelocity[leg][i] = Dampening[leg][i] * ImpactVelocity[leg][i];
        ClockTimeSinceLastBounce[leg][i] = millis();

        if ( ImpactVelocity[leg][i] < 0.01 ) {
            ImpactVelocity[leg][i] = ImpactVelocityStart;
        }
        }
        Position[leg][i] = round( Height[leg][i] * (endInd - startInd) / StartHeight);
    }

    // Clear trails
    for (int i=startInd; i < endInd+1; i++) {
        setPixel(i, 0);
    }

    if (reverse) {
        for (int i = 0 ; i < BallCount ; i++) {
            setPixel(endInd - Position[leg][i], colors[i]);
        }
    }
    else {
        for (int i = 0 ; i < BallCount ; i++) {
            setPixel(Position[leg][i] + startInd, colors[i]);
        }
    }


    showStrip();
}


/**
 * Set a row of pixels to a color, cycling through colors at rainbowWait rate
*/
void StripPatterns::RainbowIndividual(int rainbowWait, int startInd, int endInd) {
  static int timeRainbowMillis = millis();
  static int colorInd = 0;

  // Delay without actually pausing the whole teensy, allowing for other delays on other pixel rows in a single loop
  if (millis() - timeRainbowMillis >= rainbowWait / LEDS_PER_STRIP) {
    // Only one gloabal var set per loop
    timeRainbowMillis = millis();
    colorInd = ++colorInd % 180;
  }

  for (int x=startInd; x < endInd+1; x++) {
      int index = (colorInd + x) % 180;
      setPixel(x, rainbowColors[index]);
  }
  showStrip();
}


/**
Adapted from https://www.tweaking4all.com/hardware/arduino/adruino-led-strip-effects/#LEDStripEffectFire
The first one (Cooling) indicates how fast a flame cools down. More cooling means shorter flames, and the recommended values
are between 20 and 100. 50 seems the nicest.
The Second parameter (Sparking), indicates the chance (out of 255) that a spark will ignite.
A higher value makes the fire more active. Suggested values lay between 50 and 200, with my personal preference being 120.
The last parameter (SpeedDelay) allows you to slow down the fire activity … a higher value makes the flame appear slower.
You’ll have to play a little with that, but personally I like a value between 0 and 20.
*/
void StripPatterns::Fire(int Cooling, int Sparking, int SpeedDelay, int startInd, int endInd) {
  static int timeFireMillis = millis();
  static int lastStart = 0;
  // One array for all pixels
  static byte heat[LEDS_PER_STRIP*STRIPS];

  // Delay without actually pausing the whole teensy, allowing for other delays on other pixel rows in a single loop
  if (millis() - timeFireMillis < SpeedDelay) return;
  // Update the delay time once per loop ASSUMING that a loop INCREMENTS through the pixels (++)!!!
  if (lastStart > startInd) timeFireMillis = millis();

  lastStart = startInd;
  int numLeds = endInd-startInd + 1;
  int cooldown;

  // Step 1.  Cool down every cell a little
  for (int i = startInd; i < endInd + 1; i++) {
    cooldown = random(0, ((Cooling * 10) / numLeds) + 2);

    if(cooldown>heat[i]) {
      heat[i]=0;
    } else {
      heat[i]=heat[i]-cooldown;
    }
  }

  // Step 2.  Heat from each cell drifts 'up' and diffuses a little
  for( int k= endInd; k >= startInd+2; k--) {
    heat[k] = (heat[k - 1] + heat[k - 2] + heat[k - 2]) / 3;
  }

  // Step 3.  Randomly ignite new 'sparks' near the bottom
  if( random(255) < Sparking ) {
    // Spark in the bottom 20%
    int y = random(0, numLeds / 5) + startInd;
    heat[y] = heat[y] + random(160,255);
  }

  // Step 4.  Convert heat to LED colors
  for(int j = startInd; j < endInd + 1; j++) {
    setPixelHeatColor(j, heat[j] );
  }

  showStrip();
}

void StripPatterns::setPixelHeatColor (int Pixel, byte temperature) {
  // Scale 'heat' down from 0-255 to 0-191
  byte t192 = round((temperature/255.0)*191);

  // calculate ramp up from
  byte heatramp = t192 & 0x3F; // 0..63
  heatramp <<= 2; // scale up to 0..252

  // figure out which third of the spectrum we're in:
  if( t192 > 0x80) {                     // hottest
    setPixel(Pixel, 255, 255, heatramp);
  } else if( t192 > 0x40 ) {             // middle
    setPixel(Pixel, 255, heatramp, 0);
  } else {                               // coolest
    setPixel(Pixel, heatramp, 0, 0);
  }
}


// For setting entire strip to one color
void StripPatterns::setColorStrip(int color, int startInd, int endInd) {
  for (int i=startInd; i < endInd+1; i++) {
    setPixel(i, color);
  }
//   ledsOcto.setPixel(endInd, WHITE);
  showStrip();
}


void StripPatterns::fadeToBlack(int ledNo, byte fadeValue) {
  uint32_t oldColor;
  uint8_t r, g, b;
  int value;

  switch (_library) {
    case LibraryUsed::OCTO_LIB:
      oldColor = ledsOcto.getPixel(ledNo);
      break;

    case LibraryUsed::FAST_LED_LIB:
      oldColor = ledsFast[ledNo];
      break;
  }

  r = (oldColor & 0x00ff0000UL) >> 16;
  g = (oldColor & 0x0000ff00UL) >> 8;
  b = (oldColor & 0x000000ffUL);

  r=(r<=10)? 0 : (int) r-(r*fadeValue/256);
  g=(g<=10)? 0 : (int) g-(g*fadeValue/256);
  b=(b<=10)? 0 : (int) b-(b*fadeValue/256);

  setPixel(ledNo, r,g,b);
}

void StripPatterns::showStrip() {
  switch (_library) {
    case LibraryUsed::OCTO_LIB:
      ledsOcto.show();
      break;

    case LibraryUsed::FAST_LED_LIB:
      FastLED.show();
      break;
  }
}

void StripPatterns::setPixel(uint32_t num, int color) {
  switch (_library) {
    case LibraryUsed::OCTO_LIB:
      ledsOcto.setPixel(num, color);
      break;

    case LibraryUsed::FAST_LED_LIB:
      ledsFast[num] =  CRGB(color);
      break;
  }
}

void StripPatterns::setPixel(uint32_t num, uint8_t red, uint8_t green, uint8_t blue) {
  switch (_library) {
    case LibraryUsed::OCTO_LIB:
      ledsOcto.setPixel(num, red, green, blue);
      break;

    case LibraryUsed::FAST_LED_LIB:
      ledsFast[num] =  CRGB(red, green, blue);
      break;
  }
}
1
2
3
4
5
6
7
8
9
10
11
12
13
14
15
16
17
18
19
20
21
22
23
24
25
26
27
28
29
30
31
32
33
34
35
36
37
38
39
40
41
42
43
44
45
46
47
48
49
50
51
52
53
54
55
56
57
#include <Arduino.h>
#include <OctoWS2811.h>
#include <FastLED.h>

#ifndef STRIP_PATTERNS
#define STRIP_PATTERNS

#define RED    0xFF0000
#define GREEN  0x00FF00
#define BLUE   0x0000FF
#define LIGHTBLUE 0x00FFFF
#define YELLOW 0xFFFF00
#define PINK   0xFF1088
#define ORANGE 0xE05800
#define WHITE  0xFFFFFF
#define PURPLE 0x8100FF
#define ENDCOL 0x62FF00

// Change for each project compiled
#define LEDS_PER_STRIP 30
// Change for each project compiled
#define STRIPS 8

enum class LibraryUsed { OCTO_LIB, FAST_LED_LIB };


// Set if using the OctoWS2811 library
extern OctoWS2811 ledsOcto;

// Set if using FastLED library
extern CRGB ledsFast[LEDS_PER_STRIP * STRIPS];

class StripPatterns {
  public:
    StripPatterns(LibraryUsed library);

    void MulticolorSineWave(int colors[4], int startInd, int endInd, int leg);
    void BouncingColoredBalls(int BallCount, int colors[], int startInd, int endInd, int leg, bool reverse = true);
    void Fire(int Cooling, int Sparking, int SpeedDelay, int startInd, int endInd);
    void RainbowIndividual(int rainbowWait, int startInd, int endInd);
    void MeteorRain(int color, int startInd, int endInd, int strip, byte meteorTrailDecay, int speedDelay);
    void setColorStrip(int color, int startInd, int endInd);

    // Predefined colors of rainbow
    int rainbowColors[180];

  private:
    LibraryUsed _library;

    void setPixelHeatColor (int Pixel, byte temperature);
    void fadeToBlack(int ledNo, byte fadeValue);
    void showStrip();
    void setPixel(uint32_t num, int color);
    void setPixel(uint32_t num, uint8_t red, uint8_t green, uint8_t blue);
};

#endif
1
2
3
4
5
6
7
8
9
10
11
12
13
14
15
16
17
18
19
20
21
22
23
24
25
26
27
28
29
30
31
32
33
34
35
36
37
38
39
40
41
42
43
44
45
46
47
48
49
#include <Arduino.h>

unsigned int h2rgb(unsigned int v1, unsigned int v2, unsigned int hue)
{
	if (hue < 60) return v1 * 60 + (v2 - v1) * hue;
	if (hue < 180) return v2 * 60;
	if (hue < 240) return v1 * 60 + (v2 - v1) * (240 - hue);
	return v1 * 60;
}

// Convert HSL (Hue, Saturation, Lightness) to RGB (Red, Green, Blue)
//
//   hue:        0 to 359 - position on the color wheel, 0=red, 60=orange,
//                            120=yellow, 180=green, 240=blue, 300=violet
//
//   saturation: 0 to 100 - how bright or dull the color, 100=full, 0=gray
//
//   lightness:  0 to 100 - how light the color is, 100=white, 50=color, 0=black
//
int makeColor(unsigned int hue, unsigned int saturation, unsigned int lightness)
{
	unsigned int red, green, blue;
	unsigned int var1, var2;

	if (hue > 359) hue = hue % 360;
	if (saturation > 100) saturation = 100;
	if (lightness > 100) lightness = 100;

	// algorithm from: http://www.easyrgb.com/index.php?X=MATH&H=19#text19
	if (saturation == 0) {
		red = green = blue = lightness * 255 / 100;
	} else {
		if (lightness < 50) {
			var2 = lightness * (100 + saturation);
		} else {
			var2 = ((lightness + saturation) * 100) - (saturation * lightness);
		}
		var1 = lightness * 200 - var2;
		red = h2rgb(var1, var2, (hue < 240) ? hue + 120 : hue - 240) * 255 / 600000;
		green = h2rgb(var1, var2, hue) * 255 / 600000;
		blue = h2rgb(var1, var2, (hue >= 120) ? hue - 120 : hue + 240) * 255 / 600000;
	}
	return (red << 16) | (green << 8) | blue;
}


// alternate code:
// http://forum.pjrc.com/threads/16469-looking-for-ideas-on-generating-RGB-colors-from-accelerometer-gyroscope?p=37170&viewfull=1#post37170
1
2
3
4
5
6
7
8
9
10
11
12
13
14
15
16
17
18
19
20
21
22
23
24
25
26
27
28
29
30
31
32
33
34
35
36
37
38
39
40
41
42
43
44
unsigned int h2rgb(unsigned int v1, unsigned int v2, unsigned int hue)
{
	if (hue < 60) return v1 * 60 + (v2 - v1) * hue;
	if (hue < 180) return v2 * 60;
	if (hue < 240) return v1 * 60 + (v2 - v1) * (240 - hue);
	return v1 * 60;
}

// Convert HSL (Hue, Saturation, Lightness) to RGB (Red, Green, Blue)
//
//   hue:        0 to 359 - position on the color wheel, 0=red, 60=orange,
//                            120=yellow, 180=green, 240=blue, 300=violet
//
//   saturation: 0 to 100 - how bright or dull the color, 100=full, 0=gray
//
//   lightness:  0 to 100 - how light the color is, 100=white, 50=color, 0=black
//
int makeColor(unsigned int hue, unsigned int saturation, unsigned int lightness)
{
	unsigned int red, green, blue;
	unsigned int var1, var2;

	if (hue > 359) hue = hue % 360;
	if (saturation > 100) saturation = 100;
	if (lightness > 100) lightness = 100;

	// algorithm from: http://www.easyrgb.com/index.php?X=MATH&H=19#text19
	if (saturation == 0) {
		red = green = blue = lightness * 255 / 100;
	} else {
		if (lightness < 50) {
			var2 = lightness * (100 + saturation);
		} else {
			var2 = ((lightness + saturation) * 100) - (saturation * lightness);
		}
		var1 = lightness * 200 - var2;
		red = h2rgb(var1, var2, (hue < 240) ? hue + 120 : hue - 240) * 255 / 600000;
		green = h2rgb(var1, var2, hue) * 255 / 600000;
		blue = h2rgb(var1, var2, (hue >= 120) ? hue - 120 : hue + 240) * 255 / 600000;
	}
	return (red << 16) | (green << 8) | blue;
}
Some LED patterns
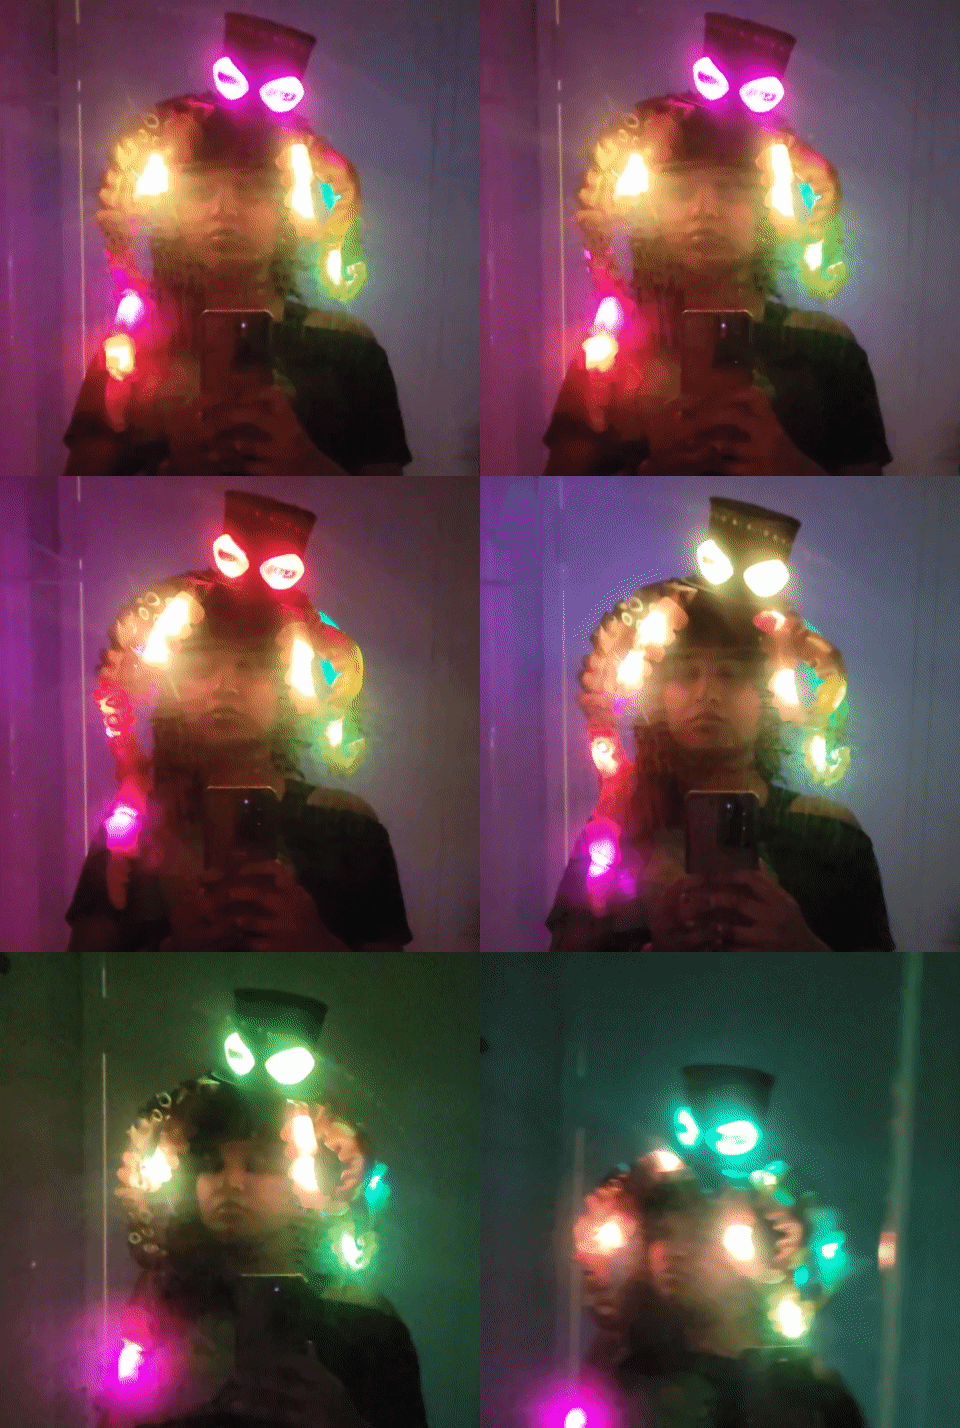

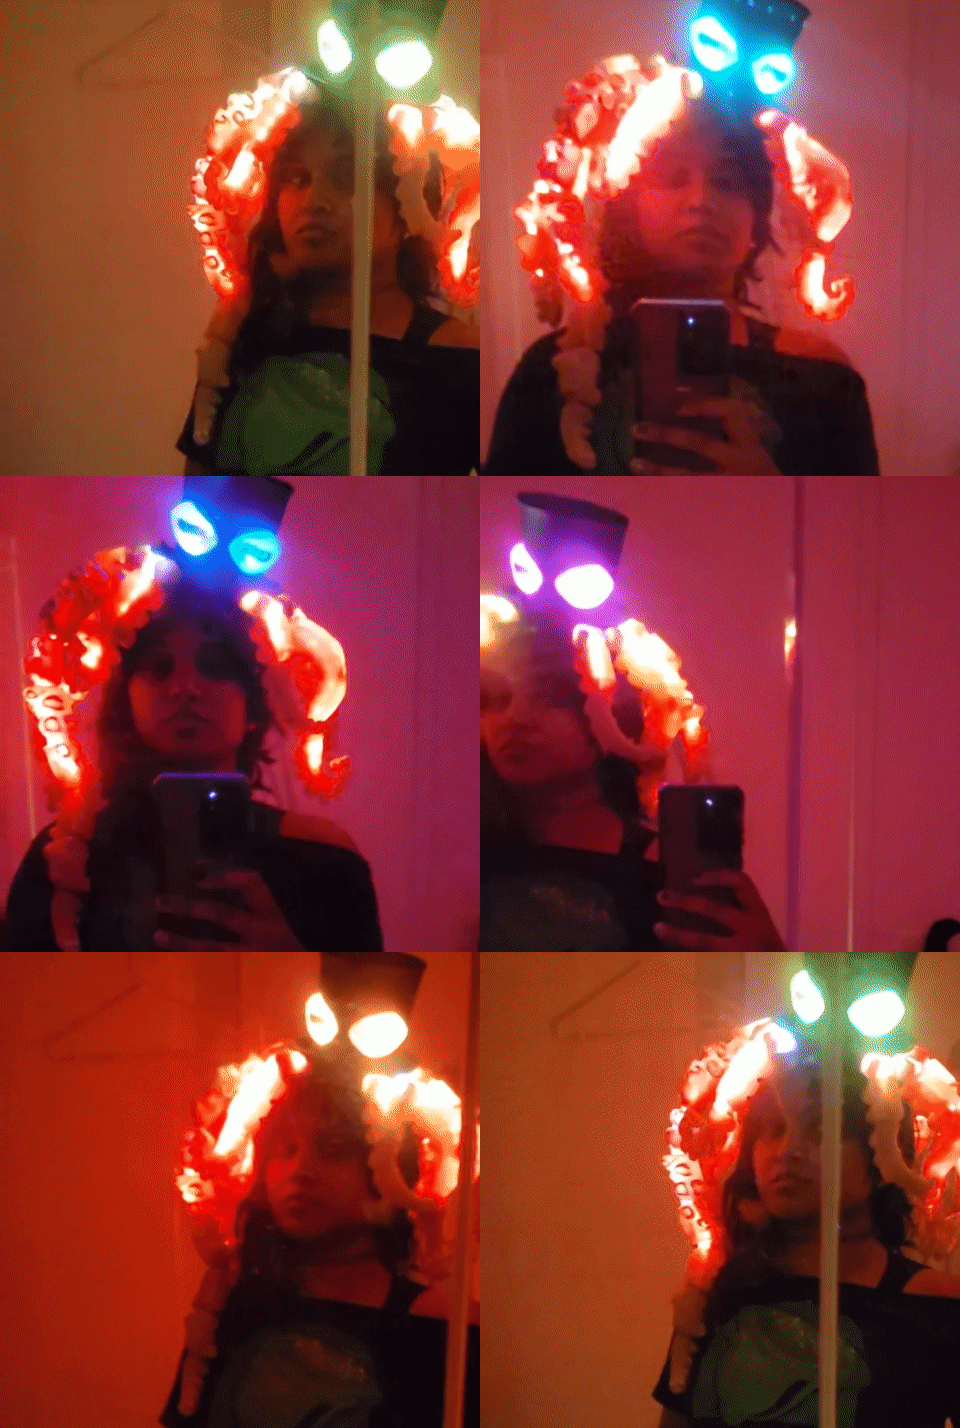
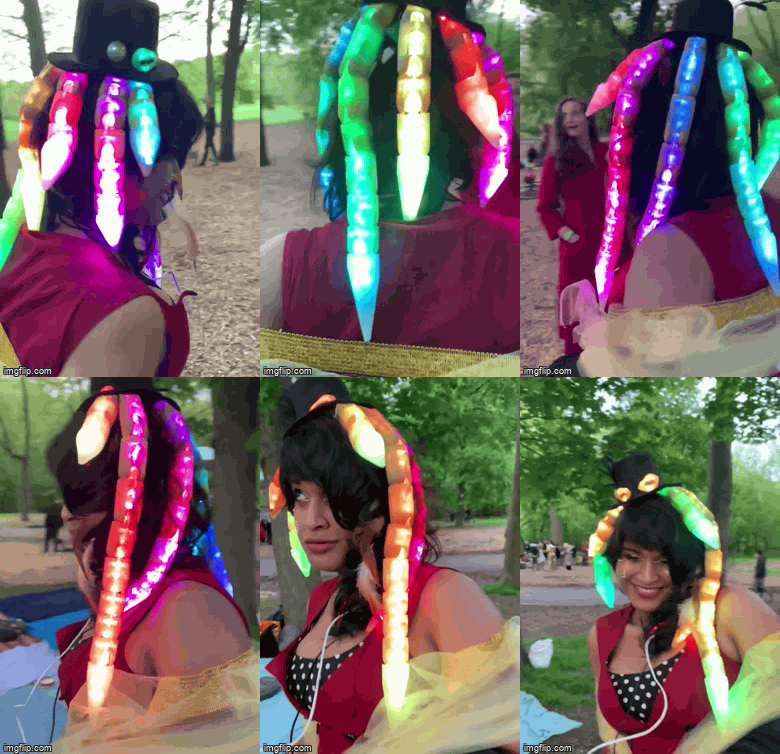
Wiring: SO MUCH soldering
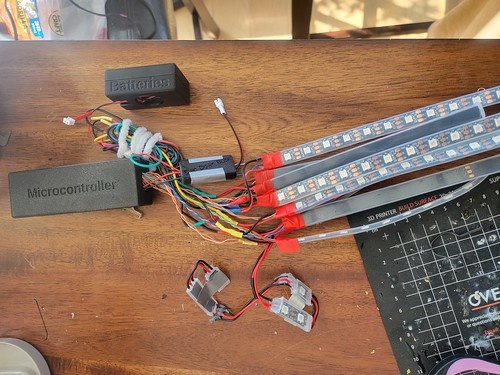
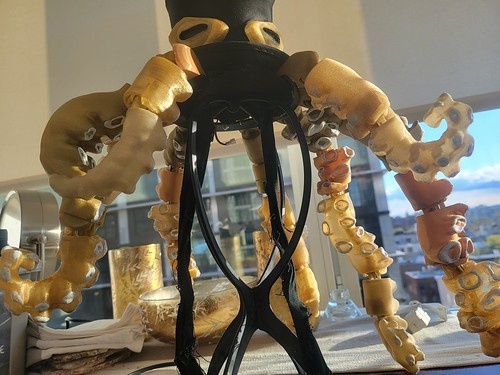
This was my first time EVER soldering, and man was it a doozy! 8 LED strips, each with Data In, Data Out, Power, and Gnd wires, each going to its own path.... it was a LOT lemme tell yea especially with the shitty $20 soldering beginner's kit I bought from Amazon. But the end result is the beautiful wiring you see here! All solder points are heat-shrink wrap protected or have silicon gel, or both, to protect them.
Upgrading to 2.0
When I initially made the hat, not only did it have the worst wiring (not pictured lol) but it also had pretty ugly/robotic looking tentacles. When I did version 2.0, I fixed BOTH problems along with adding an internal lithium ion battery pack to go with the ability to run off of an external pack!
Final Assembly and Look!
Materials used
| Name | Cost | Notes |
|---|---|---|
| Manpower | $0.00 | So many hours.... more than 80+ for doing version 1 + version 2.... |
| New Hat | $17.00 | https://www.amazon.com/dp/B07XGCVNNG |
| Filament | $45.00 | Approx usage, probably |
| Silicone conformal coating pen | $13.00 | Make the board more resilient |
| Heat Shrink Wire Electrical Connectors Kit - Butt, Ring, Spade | $11.00 | Fore better connecting/splitters/wiring and such I guess? Without soldering? |
| Wire stripper/crimper tool | $7.00 | About time anyways |
| 3.7v 1100mAh lipo rechargeable batteries x4 | $41.00 | Should be plenty of power |
| Buck converter down step x | $11.00 | In order to have 5v output from 3.7v batteries in series |
| USB LiPoly charger | $14.00 | Charging back up the batteries |
| USB mini b cable | $1.50 | for charger lol |
| More jst connectors | $10.00 | Fucking didn't realize there's multiple types of 2 pin jst connectors and got the wrong one initially... |
| WS2812B Addressable LED Strip | $36.00 | 5V, 60pixel/m, IP67, 5 meters, RGB order: GRB (Not RGB) |
| Teensy 3.2 + header | $20.00 | https://www.adafruit.com/product/2756 |
| OctoWS2811 Adapter for Teensy 3.1 - Control tons of NeoPixels! | $12.50 | |
| 2-Way 2.1mm DC Barrel Jack Splitter Squid | $3.00 | |
| Tactile Button switch (6mm) x 20 pack | $2.50 | |
| Adafruit Perma-Proto Half-sized Breadboard PCB - Single | $4.00 | |
| Soldering kit | $20.00 | https://www.amazon.com/gp/product/B07S61WT16/ref=ppx_od_dt_b_asin_title_s02?ie=UTF8&psc=1 |
| Ethernet cable | $3.50 | |
| 2 Pack Black 1 Female to 4 Male 5.5mm X 2.1mm CCTV DC Power Supply Splitter Cable | $8.50 | |
| Mini top hat | $11.00 | Too small ultimately.... https://www.amazon.com/gp/product/B07D4JZ6KM/ref=ppx_od_dt_b_asin_title_s02?ie=UTF8&psc=1 |
| 10 Female 12v DC Power Jack Adapter Connector for Led Strip | $5.00 | |
| 30 Pcs 40 Pin 2.54mm Male and Female Pin Headers | $5.50 | Would have BEEN NICE to know I NEEDED this beforehand!!! |
